
An AWS VPN - Part 1
Here I set up a VPN using an EC2 instance and OpenVPN and give a step-by-step so you can also.

Here I set up a VPN using an EC2 instance and OpenVPN and give a step-by-step so you can also.
Fist up - EC2
First things first, we need a server.
Virtual Hardware
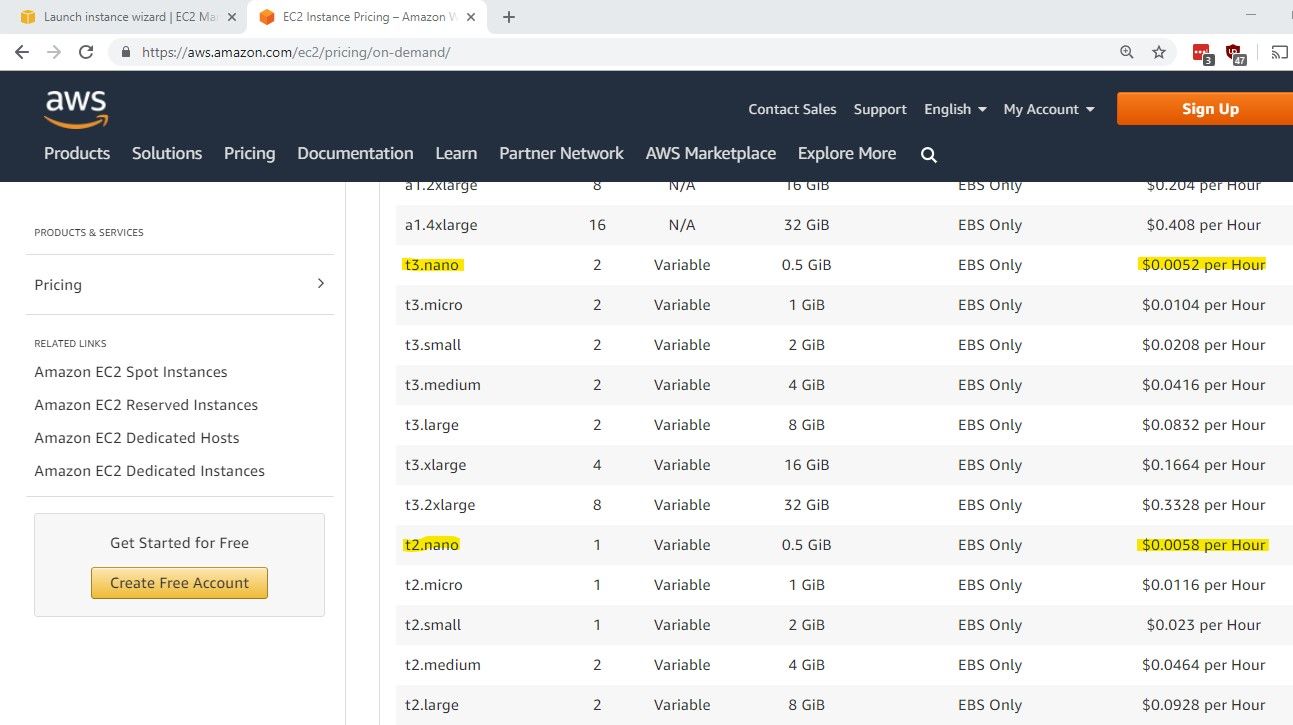
Go into the AWS EC2 console and click on the big blue button that says "Launch Instance." I'm selecting an Ubuntu 18.04 instance - you may have to scroll down to see it in the list. If you're free-tier eligible, select the instance type that's free. I'm not anymore, so I'm picking the cheapest instance type at this time: t3.nano, which comes in at a whopping $0.0052 per hour. For today's pricing check out: https://aws.amazon.com/ec2/pricing/on-demand/.
Configuration
Ok cool. We selected the hardware, next up is to configure details. You can leave the defaults here if you want. I'm only changing one setting on this page, unfortunately not captured in the screenshot. Scroll down and uncheck the "T2/T3 Unlimited" box. This will prevent your instance from consuming more elastic compute units (ECUs) than it's earned, which is great for performance, but comes at a cost. Honestly a personal VPN box doesn't need much compute performance, so just protect against the extra cost and uncheck it.

Oh! If you're feeling fancy, you can go in and add user data under "Advanced Details" which will run when the instance is created. I'm not fancy.
Next up is the Add Storage tab... Again I'm cool with the defaults. 8GB is the minimum size for snapshots, so you might as well keep it there. You pay for the size of the volume regardless if it's being used, and 8GB is plenty. So don't change it unless you're a high roller or something. Then do whatever you want.
Oh! You can encrypt if you want. I am. Encryption uses Key Management Services (KMS) keys which are charged, but we are well under the free tier usage limit here. https://aws.amazon.com/kms/pricing/ says we get free AWS-managed keys and 20,000 requests per month. We're good... Finally if you get a list of encryption keys, choose the one labeled "(default) aws/ebs"
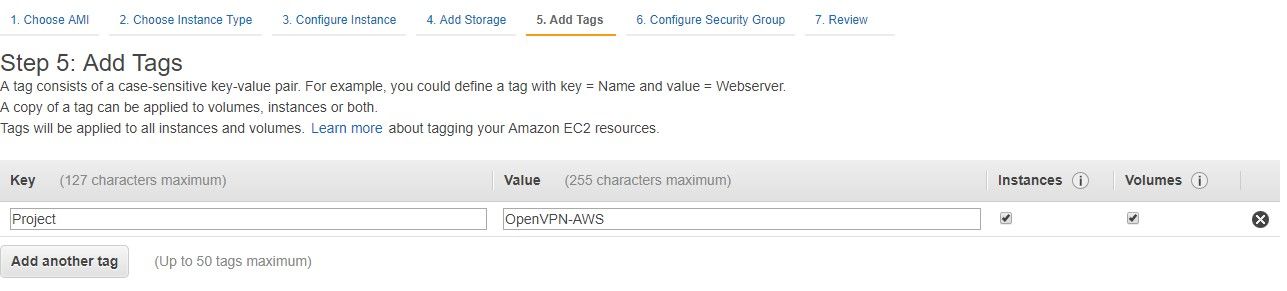
OMG Tags!
Ok, so I have learned to enjoy tags. I sucked at them at first. I probably still suck at them. But they're cool, trust me. You can tag all your AWS things making them easy to find if you have a long list of assets, or you can break out the costs separately by tag. I'm a fan. They're set up like Key/Value stores. Pick your keys to be useful across AWS. "Project" is one I like, but also a common one is "Name." That's handy because it's the first column on most AWS console pages, so pre-filling name now saves the "what is this thing?" issue later.
Security Groups
This is important. Security groups are sort of like network firewalls. They can prevent traffic from reaching your instance and by default allow traffic out*. More than once I've had issues connecting to my instances because of security groups. You can always update it later, but let's just configure it now and move on.
*when configured this way with default VPC.
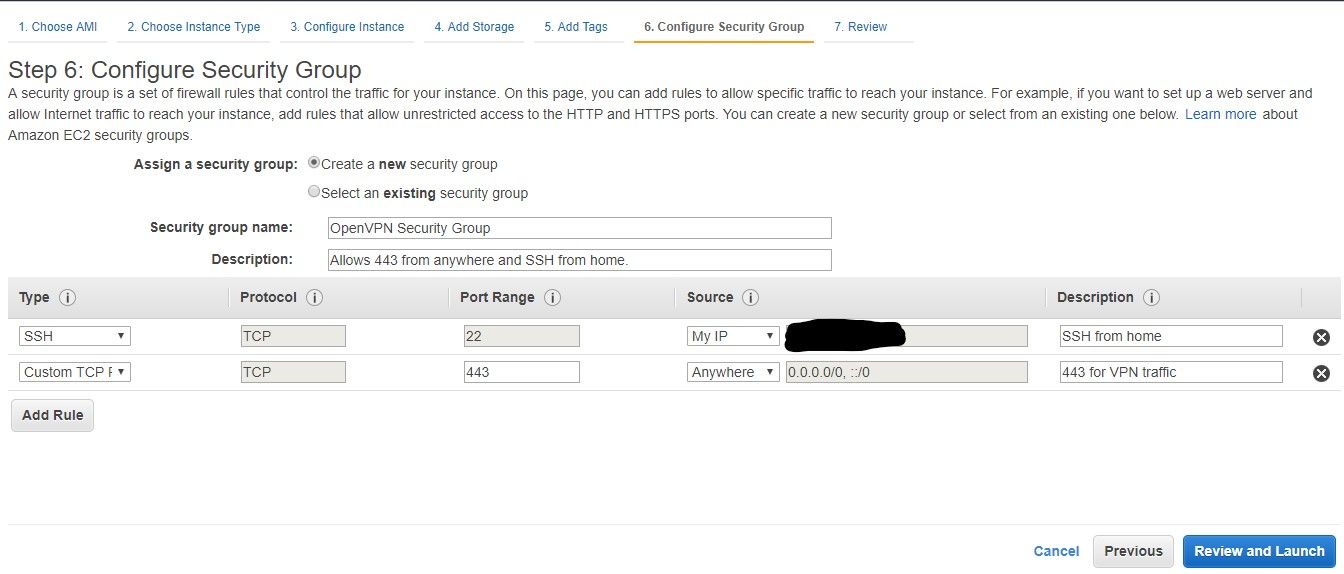
Ok. I hear people yelling already and I'm not even done configuring the instance... I'm selecting a non-default protocol and port for the VPN traffic. Why? Because some hotels and free wifi locations are not default-port friendly and block OpenVPN's default port of 1194. I even had a hotel once who blocked UDP(???!?!?) to my instance. It seemingly worked fine after changing the configuration and my security group to TCP and I haven't had an issue since. So there we go. I limit SSH to home to reduce attack surface. If you need remote configuration from elsewhere you can log into the AWS console and change the source there. If you can't trust your network enough to log into the console over HTTPS, maybe you shouldn't be using it for SSH either. Just a thought.
Review and Launch
Click it! Click Launch! Then do this.
This is important.
Really important.
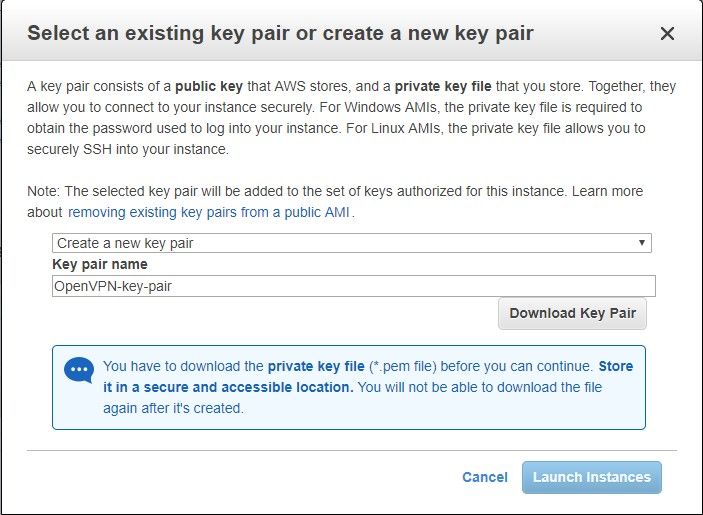
Download or select your key pair. You need this to SSH into your instance. Notice how the wizard won't even let you launch until you've downloaded the key pair? This is the only chance you get at downloading it so don't lose it or else you lose SSH and management of the instance and you get to start over.
SSH Key Business
Next up we need to change that .pem we just downloaded into something PuTTY can use. Make sure you have the most recent updates for putty and the puttygen.exe file. Open puttygen and click "load" and select the .pem you downloaded. Add a passphrase if you feel like it and click "save private key" to save a .ppk.
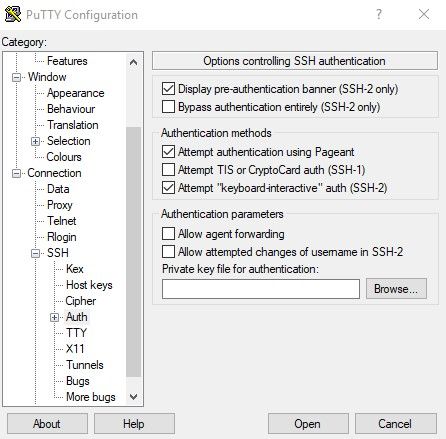
Load up putty and on the left part expand "SSH" and then select, don't expand Auth. Browse for the private key and then on the left, go back to the main "Session" tab... There's a box in the middle named "Saved Sessions," give it a name like "cloudVPN" or something and then click the save button. This makes it easier to open your putty session later.
First SSH
This all has given your EC2 instance more than enough time to start. Go back to the browser window and click on the blue button "View Instances" or go back to your main EC2 console and click on instances. you should see yours running.
Select your instance and in the info pane below, select the copy button that shows up next to either your Public DNS or IPv4 Public IP when you hover over them. Either of the two works for now. Paste this info into your putty window, under the Host Name box and click Open.
You're greeted by a security alert. What!? We just set this up... Don't fret, it's just telling you that this is the first time you've connected to this IP. Putty is trying to keep you from getting man in the middle'd (MiTM'd). Click Yes, no, or cancel depending on your trust level. Actually read this notice. It's short.
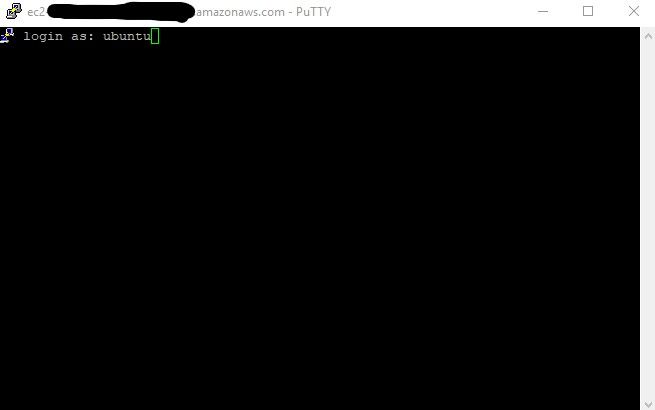
Default user names are different based on the Amazon Machine Image (AMI). We chose Ubuntu 18.04, so type in ubuntu as the username. If you chose the default AWS Linux AMI type, then your user is ec2-user.
That's it for Part 1. Keep an eye out for Part 2 where I step through setting up an OpenVPN instance. Feel free to check out other tutorials, most of them are good but I especially like Digital Ocean's: https://www.digitalocean.com/community/tutorials/how-to-set-up-an-openvpn-server-on-ubuntu-18-04
I do things a little differently than the tutorial, so check my walk-through out here: https://cloudhobbyist.com/aws-vpn-2/.